Inventory
With the inventory register, it is possible to inventory a control area and insert the items in the stock.
It is possible to carry out 2 types of inventory:
- Partial: used when part of the inventory is already inventoried and you want to add items to the inventory.
- Complete: used when you want to inventory all the items that are stored.
It is possible to change the inventory number in Settings > Inventory Number, the numbering is incremental and individual for each item.
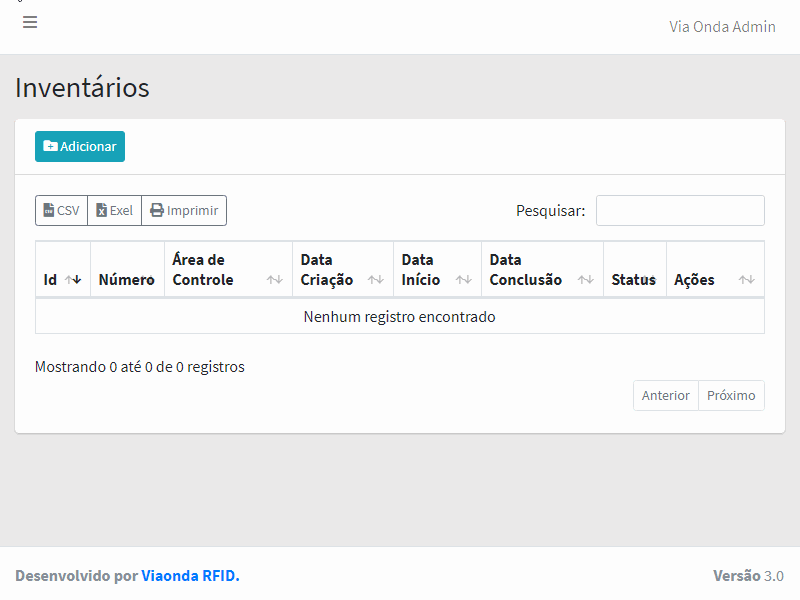
Status
- Created: inventory created by the system
- Started: start adding items
- Discarded: Discarded inventory, will not count items
- Finished: finished item count
- Applied: application of inventoried items in stock
Step by step
Creation of the inventory in the system, selecting the control area you want to inventory
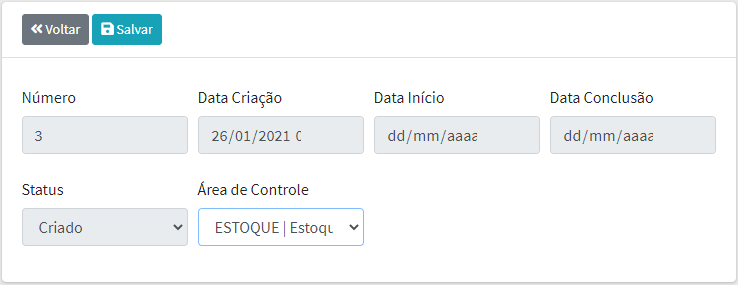
A message will be displayed notifying the status of the operation, if any error occurs during creation, its code will be displayed.

Inclusion of items in the inventory by the application using the portable reader
Validation
With the
Viaonda RFIDapplication open and paired with the portable reader, select theInventoryoption in the main menu, after selecting, type the number of the inventory you want to inventory (number created in the web system), after completing it, clickValidate Inventory.
A verification status message will be displayed.

If the verification does not find the inventory number, check the status of the selected inventory and if it is registered in the system. And also check the database settings in
General Settings > Database.Initiation
Start the inventory by clicking on the
Start Inventorybutton.
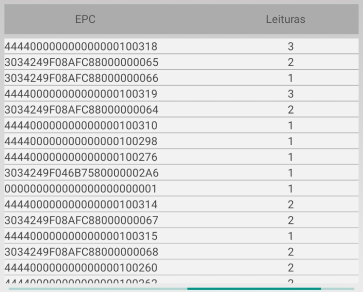
Reading
Read the items you want to include in the inventory, when performing each reading, the EPC of the read tag and the number of times it has been read will be added to the list.
Finalize the inventory by clicking on the
Finish Inventorybutton.
Confirm completion of inventory.

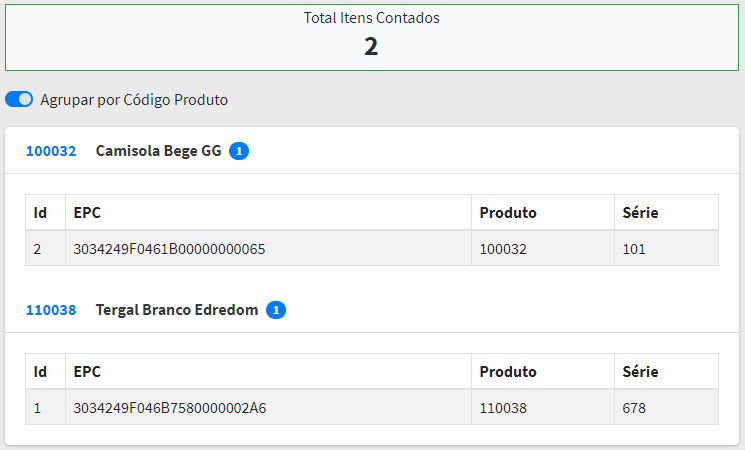
Streaming
Click on
Summary by Productto translate the EPC's read and relate them to the product registration base, the product name and quantity (series read) will be displayed.When carrying out this operation, the products that are not registered in the system will be discarded.

After translating the items, click the
Transmit Inventorybutton to transmit the data to the web system.
Confirm the inventory transmission operation.

A message will be displayed notifying the status of the operation.

Finalization of the count through the system
Check the products sent to the inventory before finalizing, validate that all are listed.
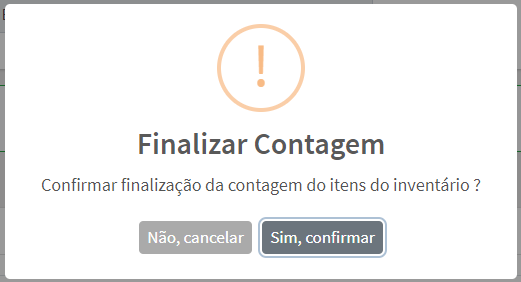
End the inventory by clicking on the
Finish Countbutton.When performing this option, it will no longer be possible to include any item in the inventory.

Confirm the finalization operation.
Application of the inventory in the system
Click the
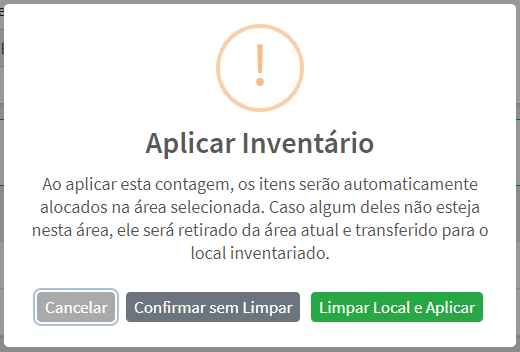
Apply Inventorybutton to apply the inventory.
Select an option for the application:
- Confirm without cleaning (partial): Items will be added in the destination control area, keeping the items that are already stored.
- Clear location and apply (complete): an output movement will be performed for all items that are stored in the destination control area and an entry movement will be performed with the inventoried items.
After application, the inventoried items will be added to the stock with the data and person responsible for the inventory

Fields
| Field | Description | Type | Size | Required |
|---|---|---|---|---|
| Number | Inventory Identification Number | Integer | 10 | Yes |
| Creation Date | Inventory creation date in the system | Date | - | Yes |
| Date Start | Inventory Start Date | Date | - | No |
| Completion Date | Inventory Completion Date | Date | - | No |
| Status | Inventory status | Integer | 10 | Yes |
| Control Area | Inventory Related Control Area | Select | - | Yes |