Ethernet Model
M-ID40 Ethernet Version
In the Ethernet Model the frequency radio settings are made through the SDK available for download in restrito.viaondarfid.com.br.


SDK
Reader Settings
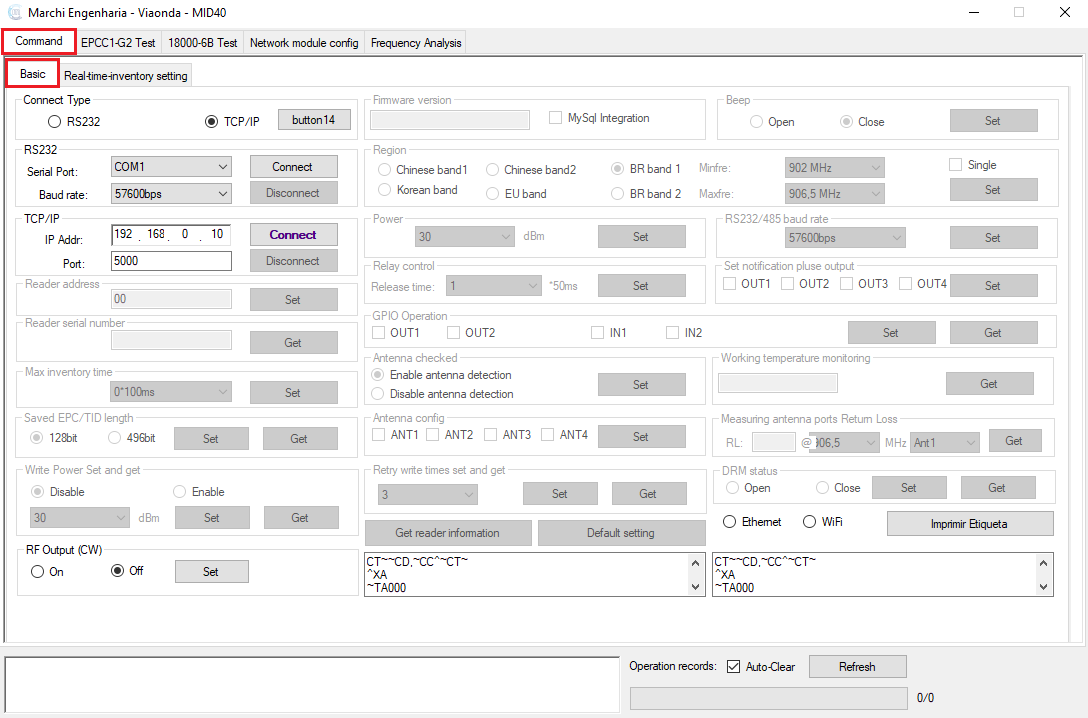
Connection
To make the reader connection to SDK by TCP/IP the default is:
IP: 192.168.0.10
Port: 5000

Important
The computer and reader need to be configured in the same IP range so that the connection occurs.
Region
In the Region field, the frequency can be configured, choosing a fixed frequency range or an entire range with start and end.

Power
In the field Power, It is possible to change the reading power by 0dbm to 33dbm limiting the reading distance as the power is reduced.

Antennas
In the field Antenna config can be selected which antenna wants to be active or inactive for operation.

Also for reference, the reader has identification in the connectors to the antennas as image below.

GPIO
in the field GPIO Operation, using the button Get is obtained which input or output are on and off, and the button Set To save some manual change at the reader input or output.

In the reader it is also possible to identify which inputs or exits are active through the identification LED.

Fast Reading
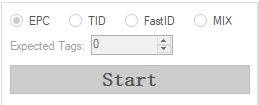
At the top of the SDK selecting the tab EPCC1-G2 Test and below the Answer Mode tab, It is possible to perform reading tests with various configurations options. The reading is started by pressing the Start button.
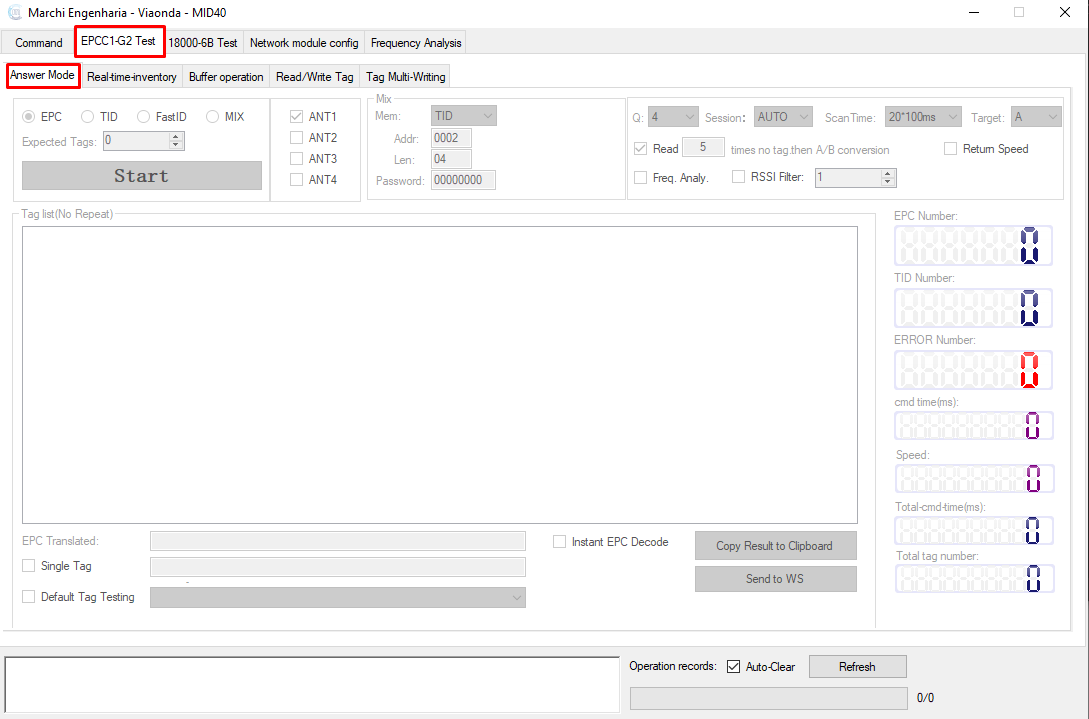
Reading Settings
In this field it is possible to change the memory bank to be read. And by pressing the Start button the reading starts.
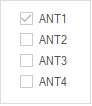
In this field it is possible to select the antennas that will be active while reading.
At the Tag list area you get the readings.
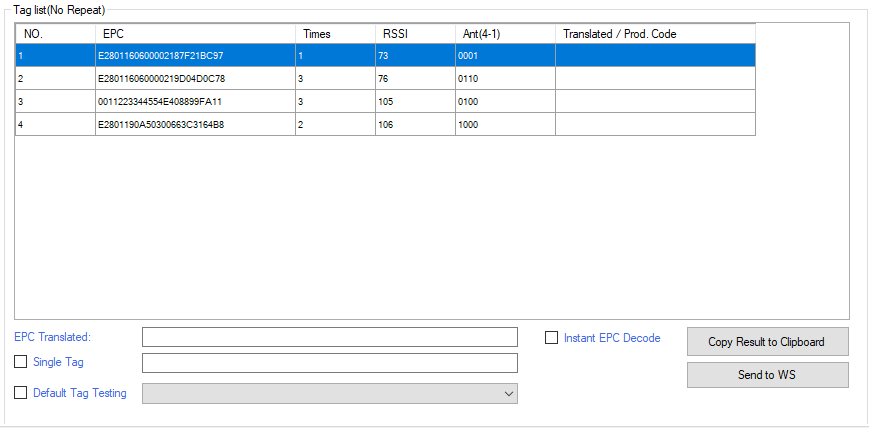
In the area of tag readings we have the information separated in columns, being:
NO.: Sequence number the tag was read.EPC: EPC Code of tags read.Times: Times the same tag has been read.RSSI: Tag power response.Ant(4-1): Antenna that performed the readings.- 0001: Antenna at connector 1
- 0110: Antenna at connector 2
- 0100: Antenna at connector 3
- 1000: Antenna at connector 4
Translated/Prod. Code: Product code translated when integrated into a database.
Information
RSSI(Received Signal Strength Indicator). It is a measure of the power level received by an antenna from a wireless device(tag)
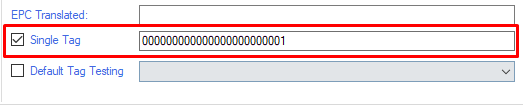
If you are using the software version with a tag filter, you will be able to filter readings. To select the tag to be filtered just give 2 clicks with the left mouse button or type the full EPC in the text field. The Single Tag option needs to be checked for the filter to work.
Write
At the top of the SDK selecting the EPCC1-G2 Test tab, and the Read/Write Tag tab below, It is possible to rewrite tags with various settings options.
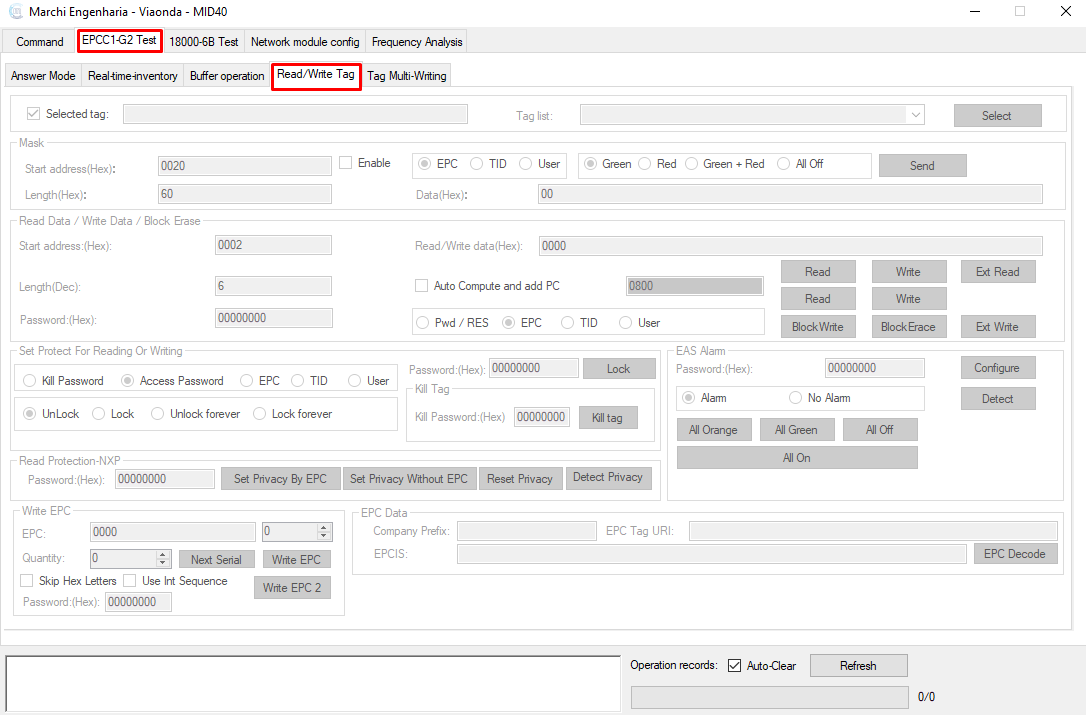
Write Settings
For recording, if there are other tags within the reader's reach, you can select and record only the selected tag.

It is also possible to use a mask for reading and write.

Important
To use the Mask function the data must be filled in hexadecimal.
In this field we can read and write tags by clicking on Read to get the tag EPC, and Write to rewrite the tag with new EPC filled on "Read/Write data".

TCP/IP Configuration
The TCP/IP configuration are made by the browser using the reader's IP, or through the software that is available for download by accessing our restricted page by the link restrito.viaondarfid.com.br

Important
To access the configuration page on browser, your machine needs to be in the same IP range as the reader. By default, the reader's IP is 192.168.0.10.
- User: admin
- Password: admin
Software USR
Search Device
On the home page, clicking on Search Device readers found on the network will appear.
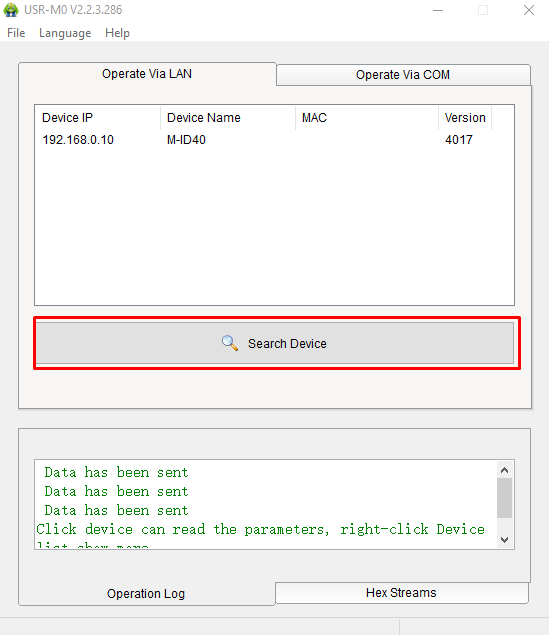
Important
In some cases for the reader to be located, it is necessary to change the computer IP settings to the same IP range as the reader. By Default the reader's IP is 192.168.0.10.
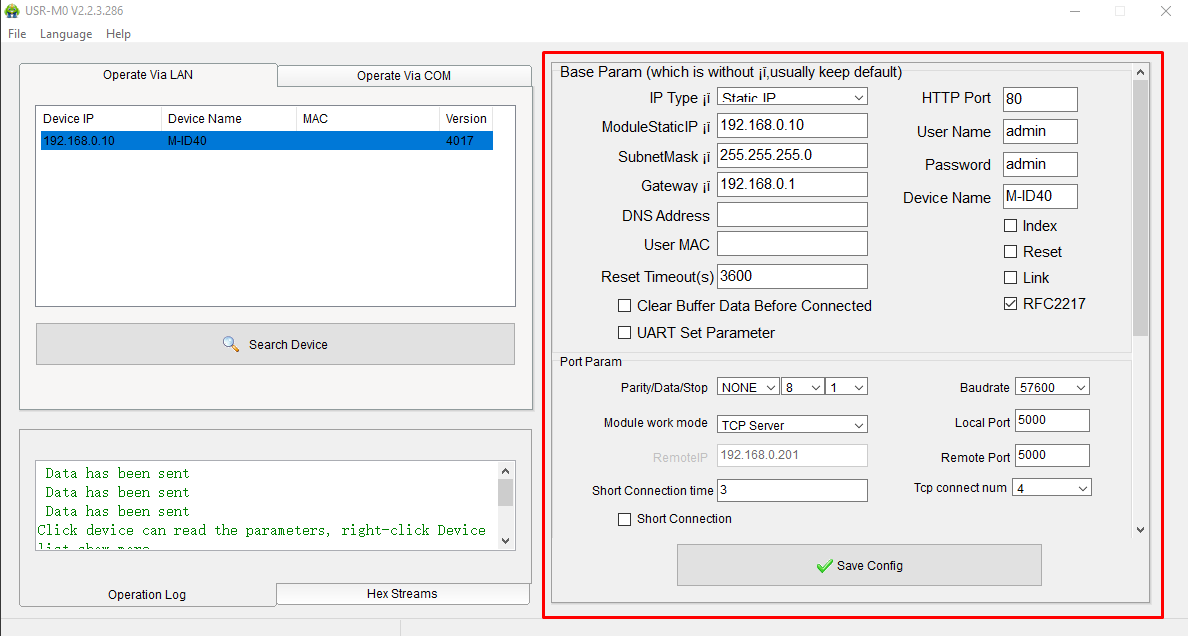
Network Settings
After selecting the reader that wants to make the configuration, the settings page will appear according to the image below. In this page you can change for example, the IP, network mask, gateway, mac address, etc..
After filling with the new information just click on Save Config button to save the new configuration. After a few seconds click again in Search Device to validate if the settings were successfully saved.